Deploy a Compose with Dokploy
A direct guide to installing Dokploy on a VPS and deploying a production-ready Docker Compose application.
Tanguy Pauvret
I have been using Dokploy for months now, and it has been a major discovery for me.
It is rare to find a tool that balances simplicity with power so well. Dokploy is free, open-source, and brings a top-tier UI/UX to self-hosting. It makes managing your own infrastructure feel as smooth as using a managed platform, but with full control. The community around the project is amazing, and it scales effortlessly from a single side project to a complex microservices architecture.
Here is how I set it up and deployed a full stack app using Docker Compose.
1. Installation: The One-Liner
Everything is well documented in their official documentation, but the process is incredibly simple.
Get a fresh VPS (Ubuntu 22.04 or 24.04 recommended). SSH into your server and run this:
That is it. The script installs Docker, configures the necessary networks, and spins up the Dokploy dashboard.
Once finished, open your browser and go to
http://<YOUR_VPS_IP>:3000.Troubleshooting: "I can't access the panel"
If the page hangs, 99% of the time it is your VPS firewall. You need to allow traffic on port
3000.If you are using UFW on the server:
If you are on AWS/Hetzner/DigitalOcean, check their "Security Groups" or "Firewall" tab in their UI and open TCP port 3000.
2. Configuration & Security
Create your admin account.
Do not skip this step: Go immediately to Settings and enable 2FA. You are hosting this on the public internet; a password is not enough.
3. Deploying a Compose Application
This is where Dokploy shines. The UI is intuitive.
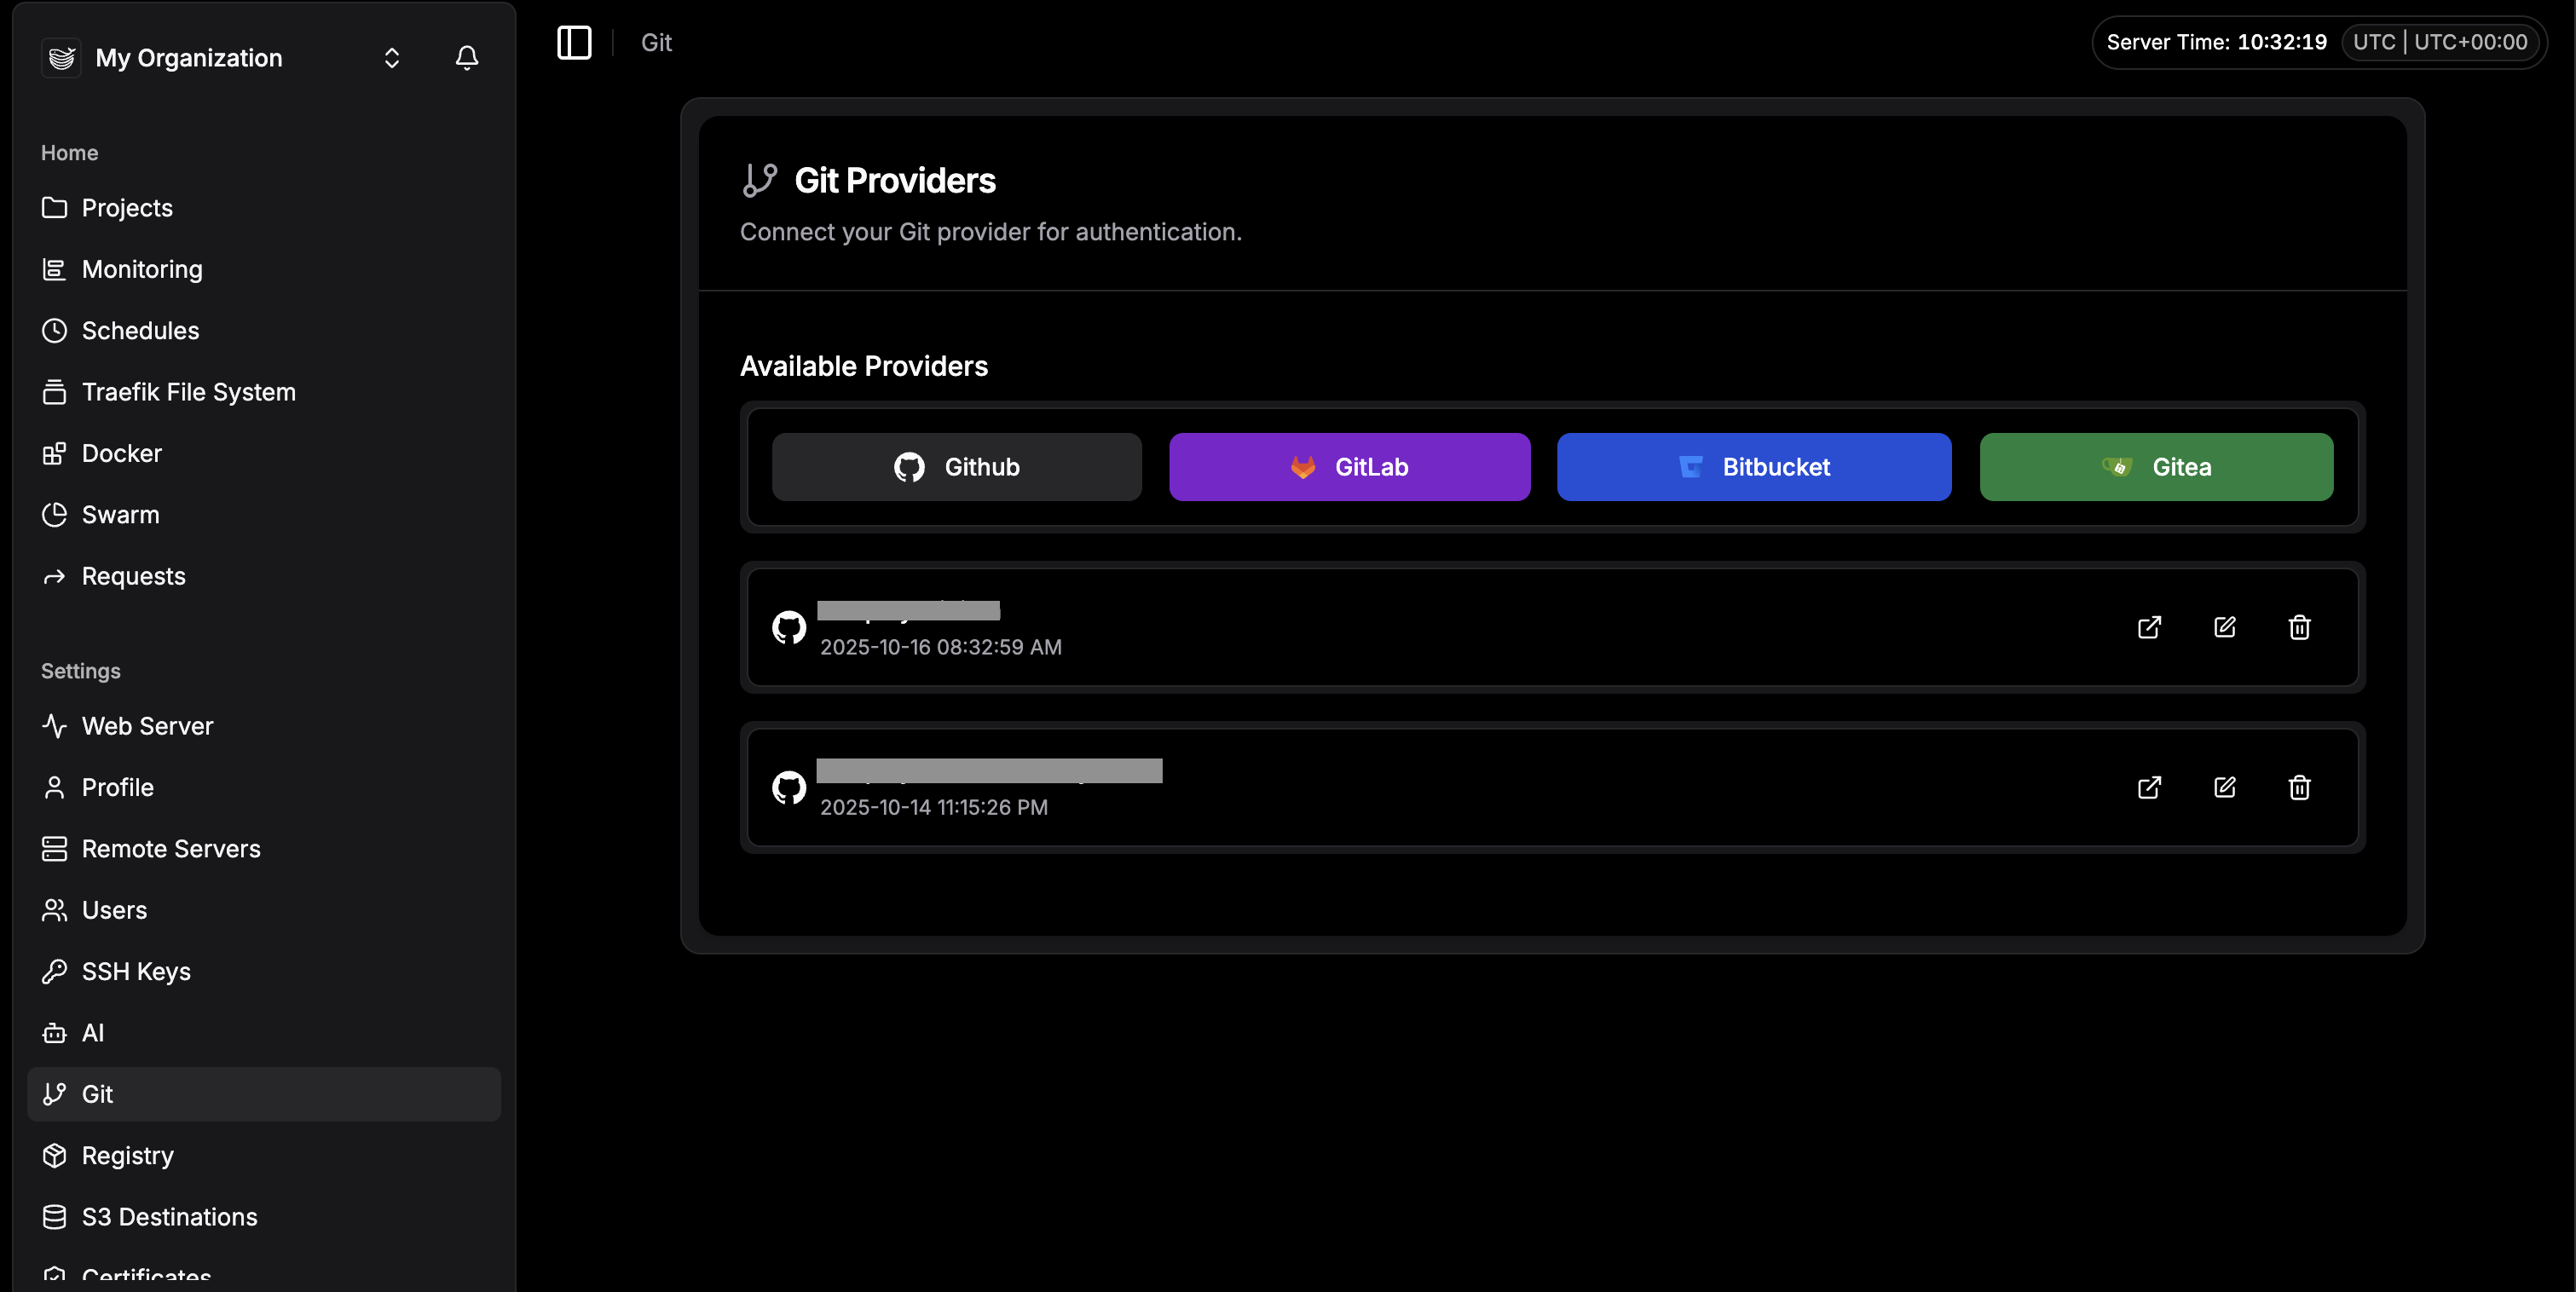
First, go to the Git tab in the sidebar and connect your provider (GitHub/GitLab). It takes two clicks.
Now, let's deploy a real project. If you don't have one, you can use my SaaS Boilerplate to test this flow.
- Go to Projects (top sidebar) and create a new project (e.g., "my-saas").
- Click Create Service and select Compose.
The Deployment Flow
Before clicking "Deploy", we need to follow a specific order to avoid build failures.
Step 1: Environment Variables
Go to the Environment tab. Copy-paste your
.env content here. If your compose file relies on env variables, they must be defined here.
Step 2: Git Configuration
Go back to the General tab:
- Provider: GitHub
- Repository:
Bima42/saas-boilerplate(or yours)
- Branch:
main
- Build Path:
/(usually root)
You can toggle Auto Deploy if you want new commits to trigger builds automatically.
Step 3: Deploy
Click Save, then click Deploy.
Switch to the Deployments tab. You will see the logs streaming in real-time. It will pull your repo, build the images defined in your
docker-compose.yml, and start the stack.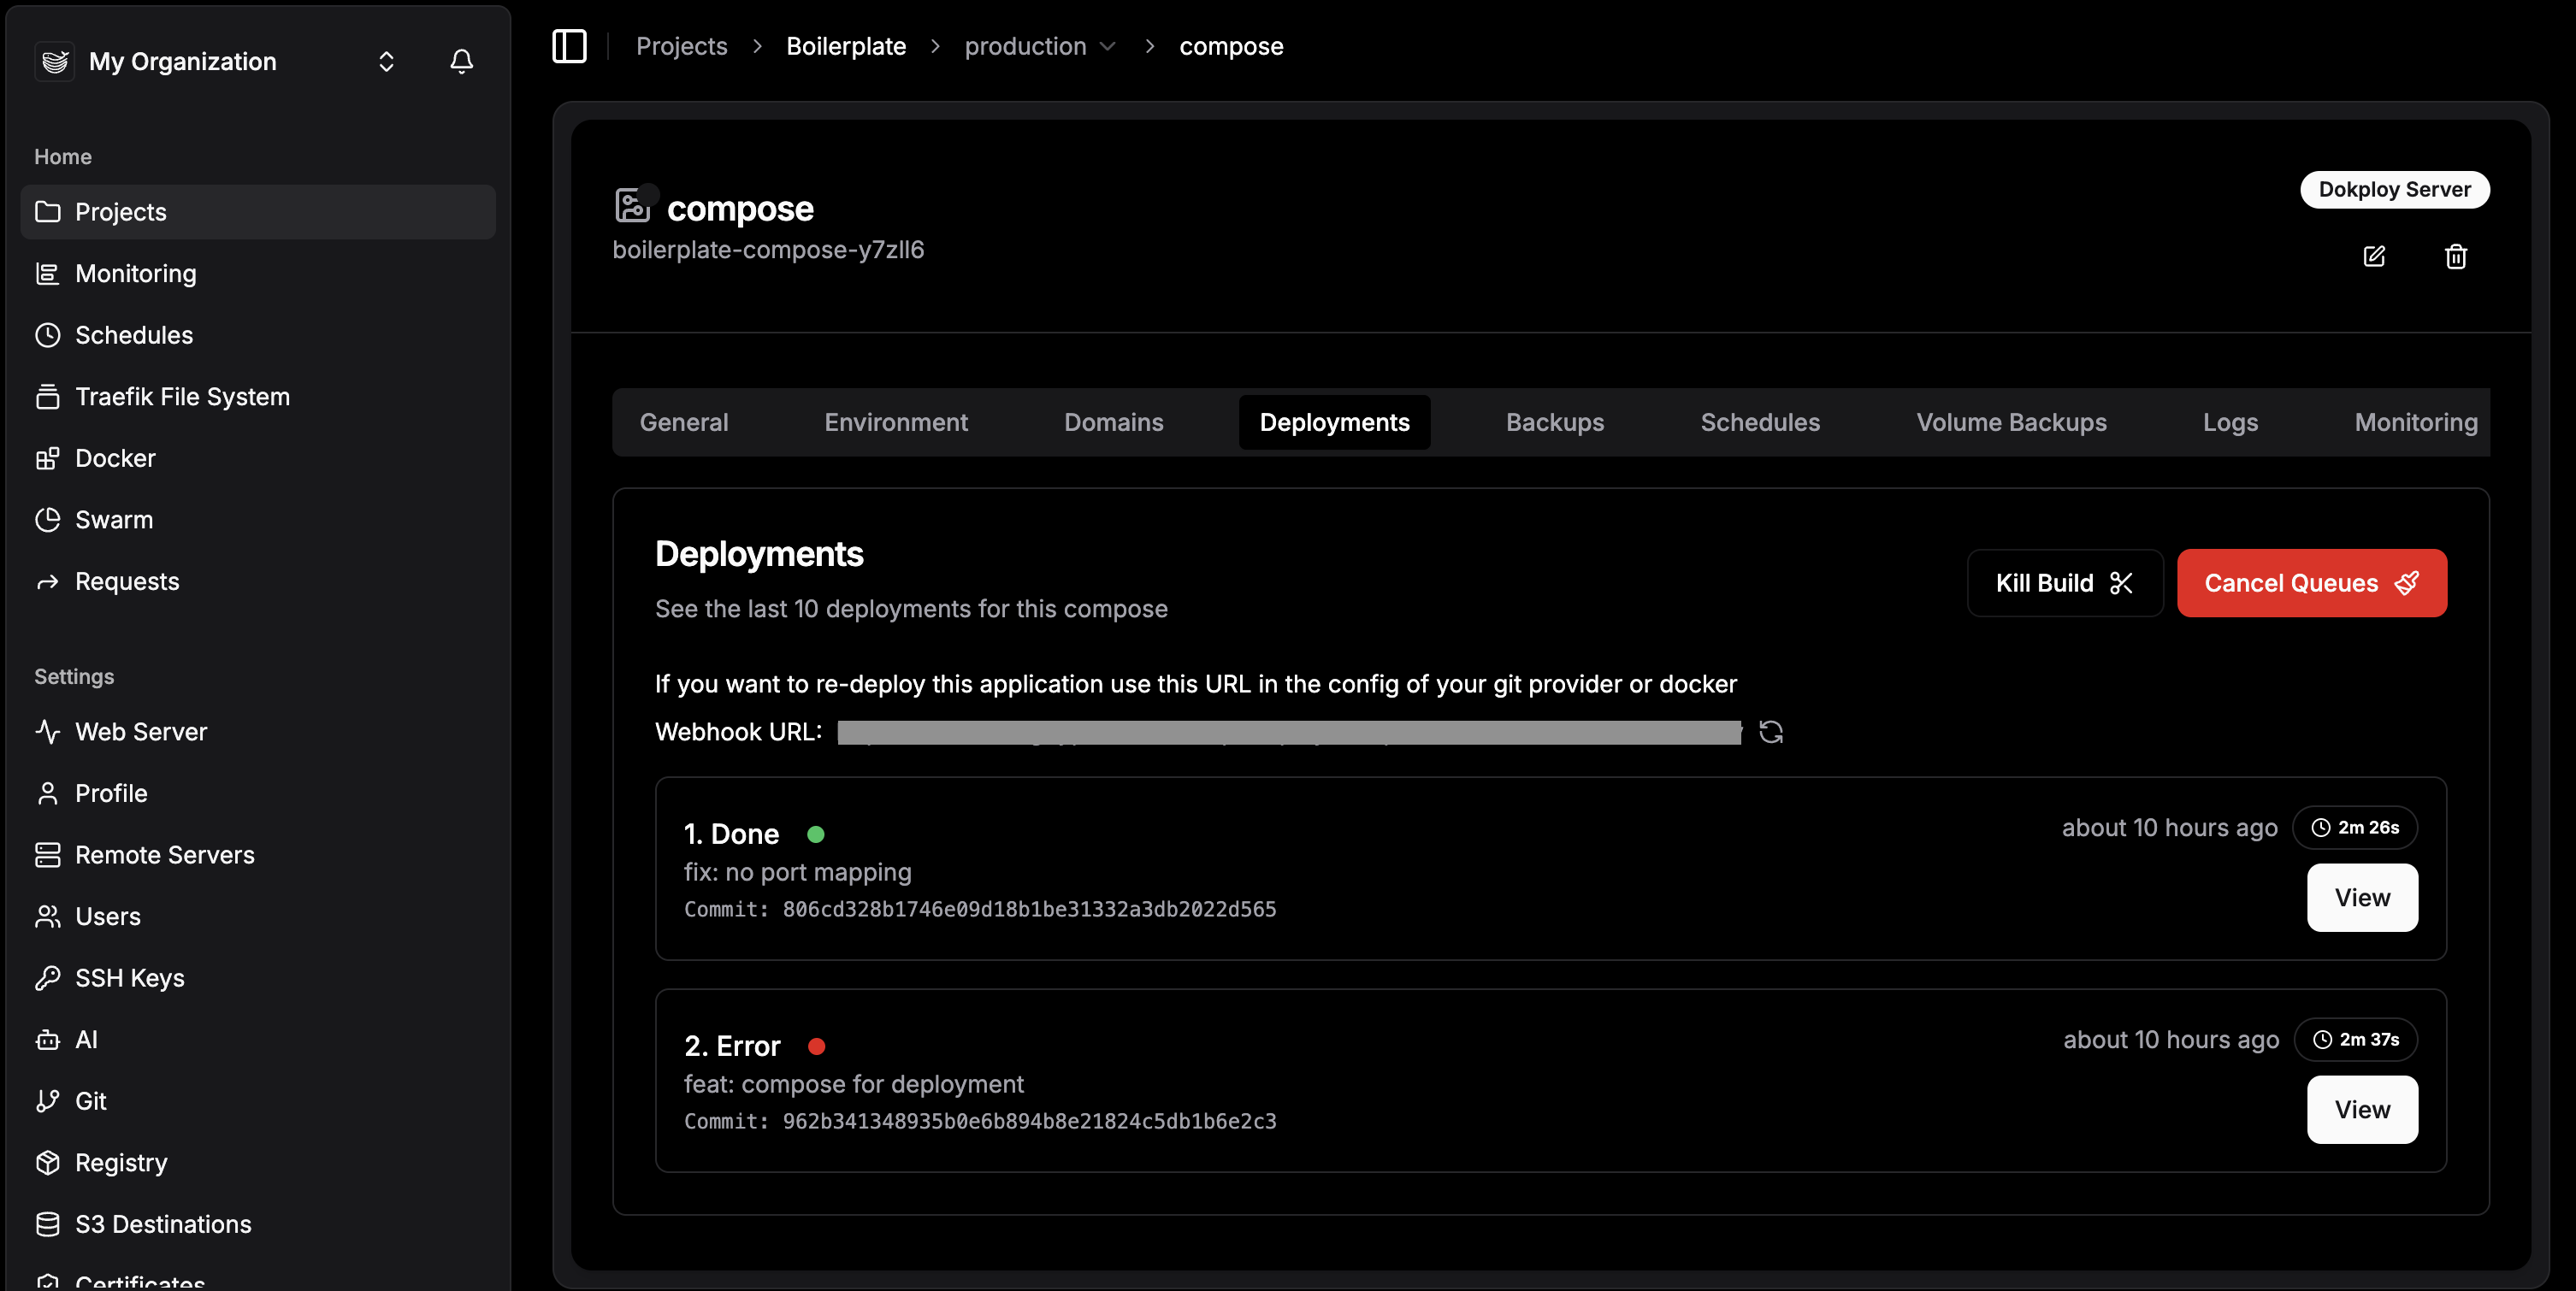
4. Setting up the Domain (The App)
Your app is running, but it is stuck inside the container. We need to expose it to the world. There is detailed documentation on domains here, but here is the short version.
Go to your DNS Provider (Cloudflare, Namecheap, etc.) and create two records pointing to your VPS IP:
Type | Name | Content |
|---|---|---|
A | app.yourdomain.com | <YOUR_IPV4> |
AAAA | app.yourdomain.com | <YOUR_IPV6> |
Note: The AAAA record is optional but recommended if your VPS supports IPv6.
Now, back in Dokploy inside your Service:
- Find the Domains section.
- Service: Select the specific service from your compose file you want to expose (e.g.,
webornextjs).
- Host:
app.yourdomain.com
- Port: The internal port your app listens on (e.g.,
3000for Next.js,8000for FastAPI).
- Certificate: Select "LetsEncrypt".
- Click Create.
Dokploy will handle the reverse proxy (Traefik) configuration and SSL generation automatically.
5. Securing the Admin Panel
Right now, you are accessing Dokploy via
http://IP:3000. This is not ideal. Let's put the dashboard behind a proper domain and SSL.- Go to the Webserver tab in the main sidebar.
- Look for the Server Domain section.
- Enter your desired domain (e.g.,
panel.yourdomain.com).
- Enter your email (for SSL alerts).
- Select LetsEncrypt and click Save.
Once this is active, you can (and should) close port 3000 on your firewall to ensure access is only possible via HTTPS. You can find more info on securing your installation here.
What's Next?
This is just the basics. Dokploy also handles so much more (databases, caching, workers, cron jobs, etc.) all through the same UI.
I highly recommend testing this flow with a robust starter kit. You can clone my SaaS Boilerplate to see how a production-ready Docker Compose setup interacts with Dokploy.
It's open source, so if you find a bug or want a feature, go contribute.